
cPanel is a popular web hosting control panel that simplifies the management of websites and server configurations. One critical aspect of managing a website is regularly taking backups to safeguard your data and be prepared for any unforeseen events. Here’s a detailed guide on how to take and restore backups in cPanel.Data is the lifeblood of your website, and ensuring its safety is paramount. cPanel, the widely used web hosting control panel, offers robust backup options. In this comprehensive guide, we’ll walk you through the process of backing up your entire cPanel, ensuring your website data is secure and readily restorable when needed.
Taking a Backup:
1. Login to cPanel:
Start by accessing your cPanel account. This typically involves navigating to https://yourdomain.com/cpanel and entering your cPanel username and password.
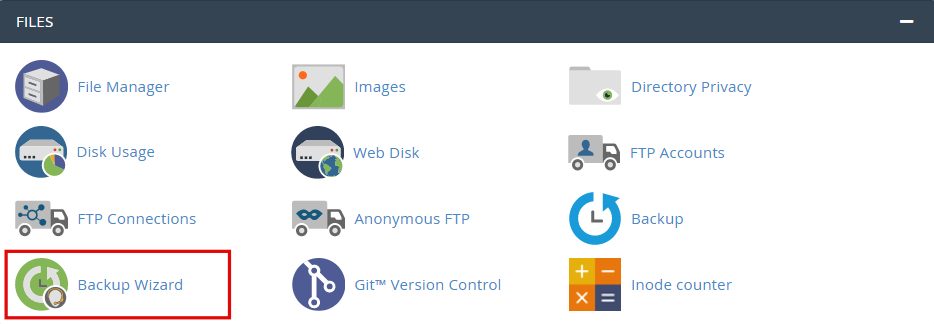
2. Navigate to Backup Wizard:
Once logged in, look for the “Backup” or “Backup Wizard” icon on the cPanel dashboard. This icon is usually found in the Files or Files & Databases section.
3. Select Backup or Full Backup:
Depending on your preference, choose either the “Backup” or “Full Backup” option. A Full Backup includes your website files, databases, email configurations, and settings.
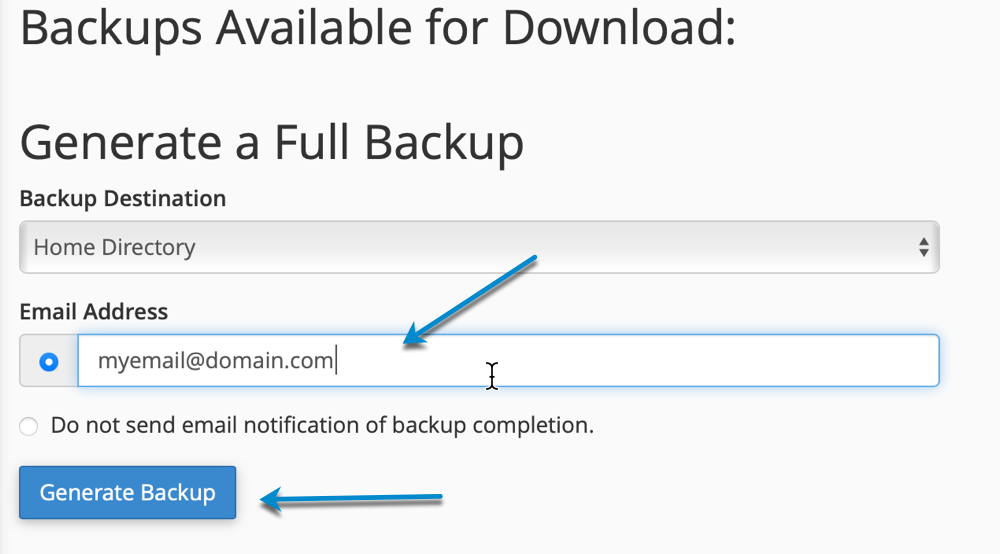
4. Choose Backup Destination:
Specify where you want to store the backup. You can either generate a backup and download it to your local machine or save it directly on the server. If you choose to save it on the server, ensure you have enough space available.
5. Specify Backup Type:
Decide whether you want to perform a Full Backup or select specific components like Home Directory, MySQL Databases, Email Forwarders & Filters, etc. Select the appropriate options based on your backup requirements.
6. Start Backup:
Click the “Generate Backup” or “Backup” button to initiate the backup process. cPanel will start creating a compressed file containing all the selected data. The time taken for this process depends on the size of your website and the amount of data being backed up.
7. Download Backup (if applicable):
If you’ve chosen to download the backup, once the process is complete, you’ll be provided with a link to download the backup file. Save this file to a secure location on your local machine.
Restoring a Backup:
1. Login to cPanel:
Access your cPanel account using the same method mentioned earlier.
2. Navigate to Backup Wizard:
Locate and click on the “Backup” or “Backup Wizard” icon in the cPanel dashboard.
3. Select Restore:
Choose the “Restore” option. This will prompt you to upload the backup file you want to restore.
4. Select Backup File:
Provide the path to the backup file. If the backup is on your local machine, you may need to upload it to the server first. Alternatively, if the backup is already on the server, navigate to its location.
5. Restore Type:
Choose whether you want to restore the Full Backup or specific components. Select the appropriate options based on your needs.
6. Start Restore:
Click the “Restore” button to begin the restoration process. cPanel will extract and restore the selected files and databases to their respective locations.
7. Verify and Test:
After the restoration is complete, it’s crucial to check your website to ensure everything is working correctly. Test various functionalities, and if there were database backups, verify that your databases are restored and operational.
Taking regular backups and understanding the restoration process is fundamental for every website owner. In the event of data loss or website issues, having a recent backup ensures a quick recovery, minimizing downtime and potential data loss. Keep in mind that the steps may vary slightly depending on your hosting provider and cPanel version, so always refer to your provider’s documentation for specific details. If you encounter any difficulties, don’t hesitate to reach out to your hosting provider’s support team for assistance.