
Here’s the detailed process of adding an email signature in Roundcube, step by step.
Table of Contents
Step-by-Step Guide to Adding an Email Signature in Roundcube
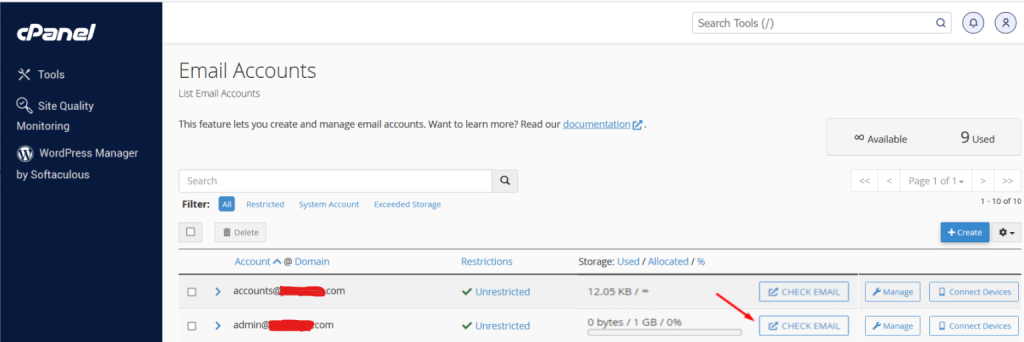
Step 1: Log into Roundcube
- Open your web browser and navigate to the URL where your Round cube webmail is hosted. This URL is typically provided by your email service provider or web hosting company.
- Enter your email address and password to log in.
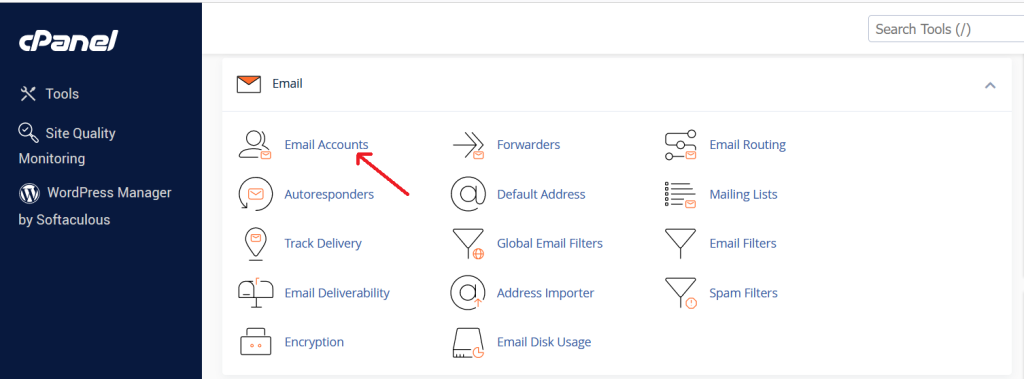
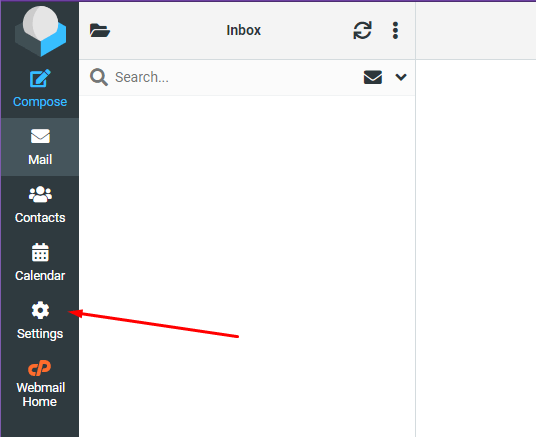
Step 2: Access the Settings
- Once logged into Roundcube, look for the “Settings” option. This is usually located in the top right corner of the interface.
- Click on “Settings” to open the settings menu.
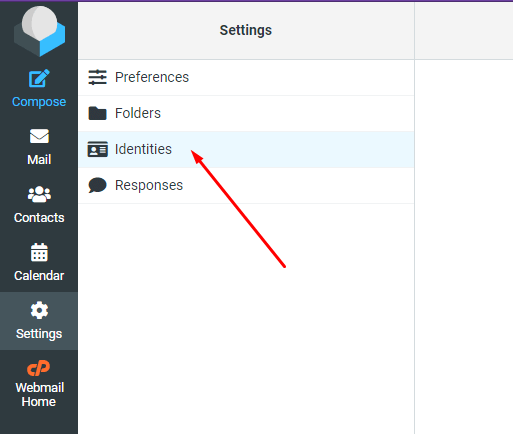
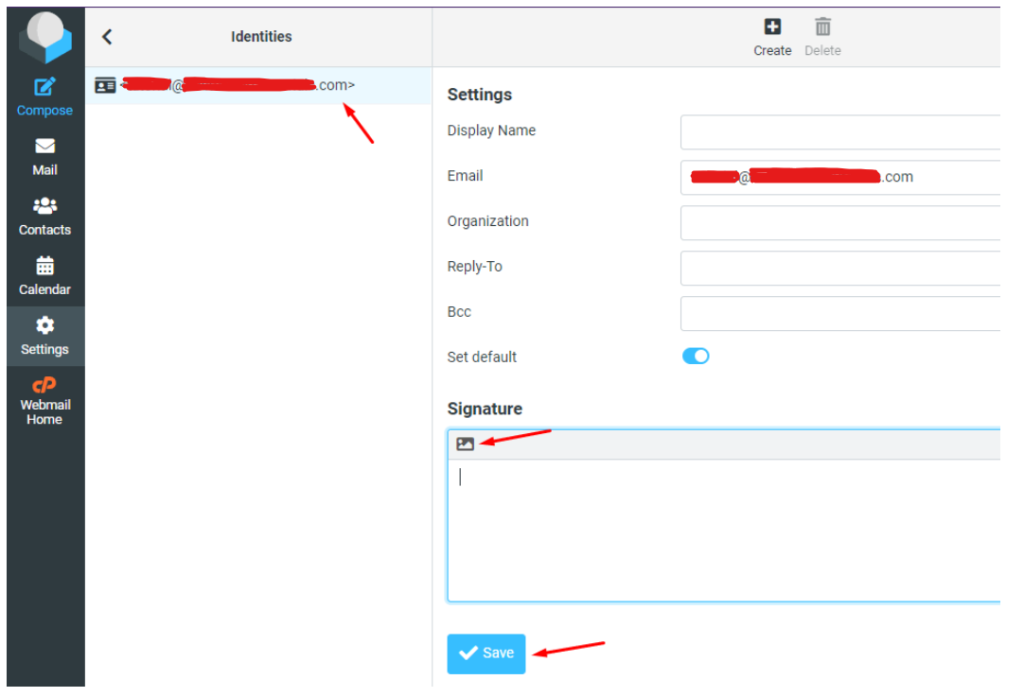
Step 3: Navigate to Identities
- In the settings menu, you will see several options. Click on “Identities” to manage your email identities and signatures.
- If you have multiple identities or email addresses configured in Roundcube, you will see a list of them here.
Step 4: Select an Identity
- Click on the identity (email address) for which you want to add or edit the email signature. If you only have one identity, it will be selected by default.
Step 5: Create Your Signature
- After selecting the identity, you will see several fields including Name, Organization, Email, Reply-To, Bcc, and Signature.
- In the “Signature” field, you can create your email signature. This field supports both plain text and HTML, allowing you to customize the appearance of your signature.
Step 6: Save the Signature
- After you have created your signature, scroll down to the bottom of the page (if necessary) and click the “Save” button to save your changes.
- Your email signature is now added to your selected identity and will be included in all outgoing emails from this identity.
Step 7: Verify the Signature
- Compose a new email to verify that your signature is appearing correctly.
- Click on the “Compose” button or “New Message” (depending on your Roundcube interface).
- Check the email composition window to see if your signature appears at the bottom of the email body.
- If it doesn’t appear, ensure that the correct identity is selected in the “From” field while composing the Email Signature.
Additional Tips for Email Signatures
- Keep It Professional: Ensure that your email signature is professional and concise. Avoid adding too much information or unnecessary images that can make your emails look cluttered.
- Include Essential Information: Include key contact details such as your full name, position, company name, phone number, and email address. Optionally, you can include your company’s website and social media links.
- Consistent Branding: Use your company’s colors, fonts, and logo to maintain consistent branding across all your communications.
- Legal Compliance: Make sure your email signature complies with legal requirements in your jurisdiction, such as including a company registration number or disclaimer if required.
By following these steps, you can easily add a professional and effective email signature to your Roundcube webmail, ensuring that your emails are well-branded and informative.